Thursday, April 17, 2014

Nearing The End Again

Whoa! Long Time No post!
So it's getting close to the end of the semester, only 4 weeks left, and then it's Spring Show and Graduation. Time has flown by. So I thought I should post something.

I had some Academy of Art University Admissions Advisors in today because they had said they wanted to learn everything they could about animation. All of our advisors are enthusiastic types so I thought let's just give them some clay and see what they can do. (Okay, I coached them a little, but only a little.)

They put in an hour and a half and look what they did! Wow, for two people who had never animated before: not bad at all. In fact, they did a great job on their first try! All of my students should watch out: these advisors could be you future stiff competition.  Here is their work:


I am going to get some volunteers to add some sound and a few titles then this will be great fun. I'll bet they want to come back and try it again in a few weeks. You know how it goes; you look at it a while and then you think, "oh, I could have put a different filter on the light, and that ease-out could have been a bit more deliberate." Clay animation: it's contagious.

Thursday, March 13, 2014

Mid Terms and Spring Break

Hi all of you,

As you know Mid Terms are this week and then it's off for Spring Break. Woo hoo!
(And...sorry for not posting for a while, but you all know how crazy it got here these last two weeks.)

Spring Break is great news, right?! Now for some other great news:


     Yep! Sony will be on campus for a presentation. So put it in your calendars now and don't forget to be there for all the great things Sony has to show to you and tell you about animation and VFX.

Ciao for now.

Wednesday, February 12, 2014

Artdog Observations: Ancient Animations

Artdog Observations: Ancient Animations

I thought I would share this blog with all of you. It is a good set of observations and makes for interesting reading/viewing...especially for students.

Wednesday, February 5, 2014

Flash CC Bone Tool

In the midst of all this Adobe Flash stuff, I thought I would mention a couple of promises that Adobe made...well, you can just read them here: http://forums.adobe.com/message/5667216#5667216.

Many professional animators I know were beyond peeved about some of the missing tools in Flash CC. [Remember, I suggested keeping your Flash CS6 and working in that?] "Updating" to Flash CC was a disaster if you were doing animated Flash work to make a living; there were ways in which the update was similar to someone replacing a carpenter's tool box with a rock and saying: "go hammer in those nails- build a house."

Anyway, I have heard scuttle, which I have yet to verify, that the bone tool and a few other favored tools are back in the CC version of Flash. If this is true, then it may be a good time to switch to the CC "update." I'll let you know what I find out. Details to come in a future post. In the mean time...what I "demo" for you in this blog is in Flash CS6.

Monday, February 3, 2014

Just for fun and inspiration: here is a video clip one of my colleagues provided. It is animated by Humberto Rosa and is just about the most joyous skip animation you have ever seen. (Funny, I always thought he was called Herbert....)


I recommend studying it and then, based on what you see here, create your own skip cycle for one of your own characters. A shorter or longer cycle, delays in other areas, different overlapping: you decide. However, having a good skip cycle on your reel would be great! Just don't copy Humberto's! Study it yes, but make your own. You can see more of Rosa's work here: http://humbertorosa.blogspot.com/

This video has been fixed since I first posted it and now loops a few times, which makes it easier to see the skip.

Motion Tween?!

Hey! this is animation, aren't all tweens about motion? "Of course they are;" is the answer. So, what would have been a better name for this automated form of tweening? It does not really matter. After all, the tool, by any other name, will still work the same. So long as you know what it is called in Flash and how to use it, (and when not to) you'll be in good shape. On we go to motion tweening a bouncing ball.

Note: The AAU Animation Department has a new standard for student work submitted as homework, for show, or for competition:

FILE TYPE: Quicktime (.mov)
CODEC: H.264 or MP4
FRAME RATE: 24fps (not 23.957)
VIDEO RESOLUTION: 1080p resolution (1920x1080)
AUDIO SETTINGS:  Uncompressed or Linear PCM, 16bit, little endian row-order, at 44-48khz.

Quicktime wrappers on all submissions only;  AVIs are not acceptable.

Okay, now on to Motion Tweening...

Start out by opening up a new file with all the correct settings, Action Script 3.0, etc. Remember, if you have set your stage resolution to default to another ratio, it is time to set it to default to 1920 x 1080. Do that before you do anything else. Go to the Properties inspector and set the properties of the stage

If you can't see your whole stage go to View in the main menu bar and choose: Magnification > Fit In Window. In the layer that is available set the duration of this animation by clicking on frame 32 and then choosing Insert from the menu bar, then choose Timeline > Frame.

Set the duration of your animation before starting this tween.
Now, click in frame one, then using the oval tool, make a circle on the stage, somewhere near the bottom left 3-thirds target. (Remember your cinematic screen divisions? If you don't start a dialog here and discuss it with your classmates.) 


With the ball selected convert it to a symbol by clicking on Modify in the menu bar and choosing Convert to Symbol. This creates an image that will be moved by flash to create this animation.


When you get the Convert to Symbol window, name the image something that you will remember. I named mine the obvious "ball," but if you had multiple balls you would need to name this one with a more descriptive name. In this case, maybe "mustard ball." Also note the Registration point– set this for where you want the symbol's registration point to be. In the case of a ball, you would most likely want that to be in the center of the ball, but for something like a snail, you might want the to be at the bottom center or bottom left or right.

Here is where the motion tweening comes in– click on frame one and this selects the symbol of the ball on the stage. Next control–click (right click for PC) anywhere in the frame span and Flash creates a motion tween span for you. [Flash will apply a light blue color to this span to indicate that it is a motion tween– it will always be this color even when not selected: do not confuse it with a set of selected frames.] Nothing will move yet, so you'll need to do some more work.


Next, click on frame 16 and drag the ball selection to the middle of the upper third of the frame. This will create a line with a bunch of dots on it, these represent the frames in the span, with the starting and ending positions marked by squares: this is the motion path. Then, on the timeline, in layer 1, click on frame 32 and drag the selected instance of the symbol on the stage to the lower right 3-thirds target. This creates a similar line between frame 15's instance of the symbol and frame 32's. See the image below.


At this point you may click on the play button if you like, but you will be appalled because the tween is not done yet. Next we will apply a curving path to this motion to give a decent arc to the action. Click hold and drag any box point, a.k.a. control point, to move the entire motion path around on the stage to get your preferred placement. Click on frame one in the layer and then option-click-hold on the control point corresponding to it on the stage and you can move that motion path origin around and place it where you want it. Now try this: click on any other points on this part of the motion path (these are called frame points) and drag the line into a curve for on half of the bounce. Now press play and you'll get an idea of where we are going with this. Once you have enjoyed the resulting weird animation, adjust the other half of the arc for some closer to decent ball bounce action.


Well, it still does not look quite right because the spacing is off. Here is how to begin to make it look pretty good.... Now, click on the motion path on the stage to highlight it and select the entire frame span in the layer, then on the timeline open up the Motion Editor tab– here are some controls. The first thing you will want to do before playing around in here is set the viewable frames to something over the number you have (it will automatically set the number to that of the selected set of frames). See the arrow at the bottom of the image below.


Click on the drop down arrow for the Basic Motion option in the Motion Editor timeline and this will open a graph editor. On the editor the keyframes you set when you were originally dragging around the symbol instances on the stage are now marked by a square. At frame 16 click on and hold the square in the row labeled Y, move it up and down and watch what happens to the shape of the motion path as you do this. Adjust the path to you liking for the Y height. 


Do the same thing you did with Y, with the X graph in the Basic Motion editor. You should play around with these options until you are comfortable with them. (Honestly you could have done this in the first place, but you will get back into this Motion Editor later.) Also play with some of the options to the right of Viewable Frames to see what they do. Remember that you can go to the menu bar in Edit and undo for quite a few steps if you make a mistake and need to get back to where you started.

Now to add some easing.... First deselect the tween span by clicking on the timeline in the blank frames area, then click on frame 17 to select it. With frame 17 selected, go to the main menu bar and choose Modify, then Timeline > Split Motion. This breaks your motion into two halves. 


Click on frame 16 and then shift-click on frame 1 to select the first frame span of your ball bounce. Now go to the Properties inspector and open the Ease drop down menu and click on the blue number 0 and change it to 90. Next, click anywhere in the second frame span of your ball bounce animation and then in the Properties inspector window, in Ease, set that ease to -90. Now play the animation. You will see that the frame points have moved closer together in the middle of the arc; in other words, your spacing has changed. Now you have something that looks more like a proper ball bounce. Once you have seen what this does play around with the settings and see what you can do to manipulate the spacing of your motion tweened animation. 

This all gets easier as you practice with it. Your first ball bounce that is motion tweened will not look nearly as good as the next. Make one that has the spacing and timing you like and save that one. You can even mess around with the symbol and make it look more like a ball and try out the 3D effects or gradients in the tools menu; make it fancy. Regardless, save the file because next time we will play with the shape tweening options.


Friday, January 24, 2014

Hello, hello to all my animation prodigies!

There are good ways to use Flash animation tools and bad ways. We will begin to explore both of these so that you learn the difference and can recognize the pitfalls. While we are doing this you must keep the old CGI adage in mind: Garbage In: Garbage Out. GIGO! In other words, do not expect the computer to somehow make the junk you put into it look beautiful. It is only a tool and cannot work magic. But it is a powerful tool, and it is a tool that can make you look like a magician if you learn to use it correctly.

Here now for you edification it a brief discussion of a few terms in Flash animation jargon...

First, I must go no further without explaining what a "Symbol" is. Or, I should say can be. A symbol is a graphic element that you can save and use again and again. A symbol can be a simple static graphic, an animated cycle, a movie clip and a few other things that we will ignore for now. Simplifying this a bit: it means is that if you use the paint tools to create a static graphic, this can become a symbol. If you want to make an animated cycle, that too can become a symbol, which you can then use the tools in flash to manipulate in all sorts of ways....

For instance. If I make an animated cycle of a snow flake falling, I only need to animate that cycle once and then I can use the tools in Flash to move it scale it and change its color, and I can duplicate it all over the screen numerous times to get a flurry of animation going. We will get back to Symbols later, let's discuss tweening now.

The first thing you should know is that there are three types of tweening in Flash
  • Classic Tweening
  • Motion Tweening
  • Shape Tweening
Please note: that there is also a form of animation called inverse kinematics. This is also considered a form of tweening by some. It is similar to the bones tool that you may have used in Toon Boom or Harmony. For now we will not discuss this and it remains to be seen if Adobe is going to keep the inverse kinematics tools around. 

Classic Tweening is, in terms of Flash animation, not the same thing as the kind of tweening that you do on paper; Flash provides some automation in this sort of tweening that is controlled by where you choose to place keyframes. [Remember when I use the term "keyframe" in this blog, I mean it in the sense that Flash uses it...when I speak of the traditional kind I will use the term "Keys."] You place a keyframe and then a number of frames later place another keyframe and every frame between these becomes a tween created for you by Flash.

Horrors! you say. A computer does not know how to animate. It is true that what you will get in this case is a very mechanical even set of changes to your images, position shape, etc. However, once this is done you can manipulate these to adjust the timing and make it look rather nice. I tend to be the sort of person that prefers to tween by drawing on every frame. Still, I insist that there are times when the automated tools can make quick and neat work of things that are not important, leaving your time and effort for the areas you really want to shine.

Motion Tweening is using a static symbol and manipulating it by moving it along a path (which you determine) for a defined set of frames (which you also determine). I'll explain how to do this shortly.

Shape Tweening is what you might imagine it to be: you set up a shape and define what that shape will be at the end of a set of frames. For instance you could very easily change a circle into a square over the span of 24 frames (I will explain this in a later post to this blog).

For a start with this automated animation we will start with something very simple, of course: a bouncing ball. [Hey look, I know you are all advanced students, so make what ever you want for this symbol, but if you really just want a quick and dirty start to this follow my steps listed here.]

1) First create a new Flash file. Call it what ever you like, but bouncing ball might work well since it is clearly descriptive. Note: you can open up a grid to help you position things by going to "View" in the menu bar and clicking "Grid" then "Show Grid."

2)  Select the first frame of the timeline then use the oval tool to draw a circle in the lower third of the stage. For a clear view of the frame contents of the frames go to the timeline's panel menu and choose "Preview in Context."You can also use the Panel Menu to to change the size of the frames in the timeline– play with it to see how it works. [The panel menu is the little square of lines with the tiny down arrow on top left corner of the timeline.]

3) Select frame 3 on the timeline and from the top menu bar chose Insert > Timeline > Keyframe, this copies the ball from frame one across all the frames up to frame 4. with frame 4 still selected, reposition the ball on the stage into a position half way between the top of the stage and where it is now.

4) Now follow the same instructions as the above step using frame 5 then position the ball near the top of the stage.

5) Now click in frame 7 and position this instance of the ball where it was in frame 3. Select frame 9 and position the ball where it was in frame 1.  [Tip: you can open the onionskin tool at the bottom of the timeline window to help you see where the ball was in frame 1 or you could turn on "snapping" in the "View" menu of the main menu bar.]

6) Now press the play and loop icons at the bottom of the timeline window. Viola! a very rough ball bouncing on 2s. You can do this on every frame and for a longer durations and really fineness the ball's timing.

Of course this is really, really rough animation, but we did it this way to show you how to use the tools. Now that you have the idea you can practice this one a bit by really trying to do a serious ball bounce.

Here is how to get a copy of the flash file I made of a slightly less rough bounce for you to look at: email me and ask or pick up a copy in the lab on the 7th floor. (I'm off the main animation network right now for some reason, I will find a nice place to store it there for pick-up too.)

Cheers and have a fun weekend animating. See you on campus on Monday!


Friday, January 17, 2014

Ducktails and...

Hey, I just found a stack of old model sheets from Ducktails. Cool! I do not want to raise the ire of the Big D by posting any of them here, so I'll wait until you get back on campus and show you them personally. Remember to ask me about them.

Now I have to apologize for something...I thought I posted a long description of how to do some Flash animation here, just before I left for the break. It had screen shoots and tips. It was supposed to be for how to use Flash to do traditional style frame by frame animation. Well, clearly I failed to push some critical button.

So... here it is, a couple of weeks late, but hopefully appreciated by all of you none the less.

(I'll keep digital copies of my demos and notes for you in the lab's demo folders and maybe a pickup window too. Let me know if you have trouble following along in the step-by-step procedure so that I can make it clear to everyone in any future revisions. )

A Few Quick Steps to Animating Traditionally in Flash CS6

* I have only tried animating this way in Flash CC briefly, but this should work there too. I recommend keeping your copy of CS6 for now.

This is a set of instructions that will explain the basics for using Flash to animate in a traditional light box style. You can draw and use images as if they are sheets of paper when you animate this way. For those of you who already know how to use ToonBoom and Harmony, this will feel a little familiar and make getting used to Flash a bit easier. I recommend setting up a small exercise for yourself, something like a dance or walk cycle, with a simple character, that is a short series of looping frames.

One very important thing to know, in Flash all frames on the timeline that have image content are called “keyframes.” The reason for this will become clear as you learn to use Flash. For now, do not let the term confuse you; I will refer to key drawings as “keys” or “key drawings.” I will reserve the term “keyframe” in my explanations for its intended use in Flash.

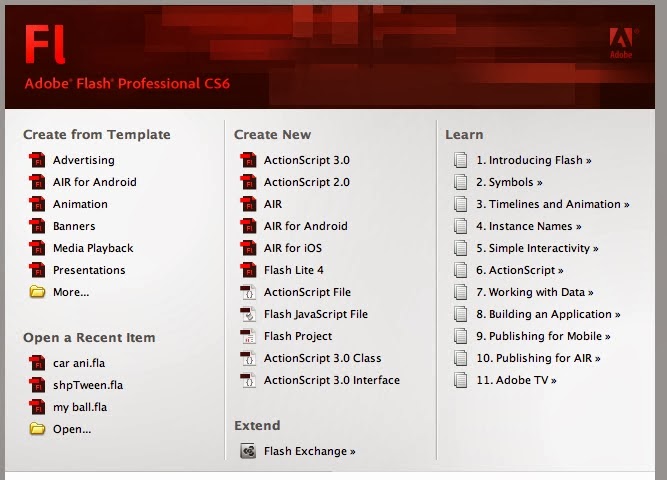
When you first open Flash CS6 you should always create a file that is in the latest Action Script format. At this time the format to choose is under “Create New,” in the middle column; click on “Action Script 3.0.” (By the way, it would do you well to click through all of the links under the “Learn” section in the third column at some point too.) After clicking on “Action Script 3.0” your workspace and stage will open automatically add a layer to your timeline.


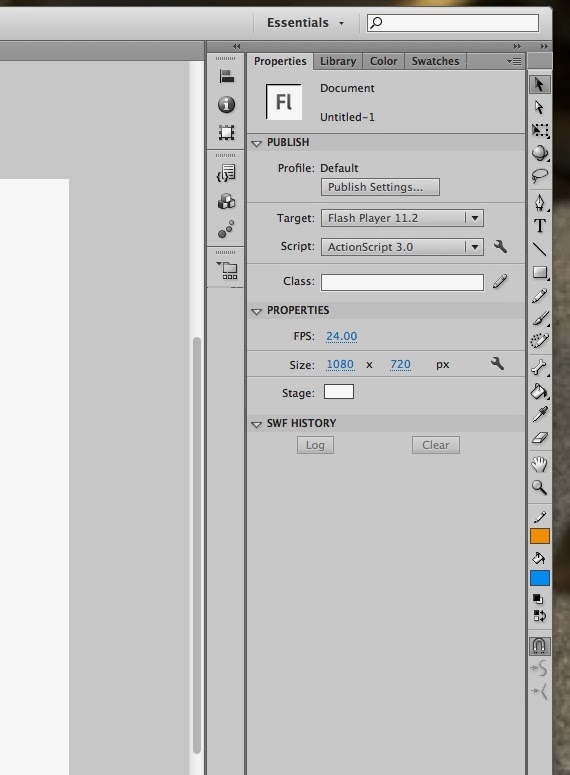
Before proceeding further, you will want to check your settings. On the left there is a set of columns and at the top of this a set of tabs (see image below). Under the tab labeled “Properties” and its sub-set also called “properties” you will see “size.” The first number to the right of size is the stage’s horizontal pixel measurement, the second number is the stage’s vertical pixel measurement. A good standard H.264 16:9 screen ratio is 1080 x 720; type these numbers into the size settings for your stage (this is usually the default size for homework). Above that, make sure the FPS is set to 24; if not change that to 24 now.


On the far left is a thin column that contains your painting and drawing (and other tools)- I will refer to this as your main “tool-bar” from now on. From the main tool-bar, select the brush tool and then explore the bottom five tools setting for the brush tool. These are:

brush mode
brush size  
brush shape 
use pressure
use tilt


Choose the settings that are comfortable for you to work in for your tablet (or other input device). [I like to turn on ‘use pressure” and “use tilt” and use a nice blue that is similar to our traditional blue pencil.] Choose a color from the “preferences” tab which now contains icons of a pencil and a bucket: the bucket is the color of your brush. To change the color, click on the color block that is to the right of the bucket icon and a color menu will pop up; choose your color from this menu. Do not change the color of the block to the right of the pencil icon; this icon should be set to “no-stroke” or a thin red diagonal line through a white square. [I will go into more detail on stroke and color menus later in a different demo.]

Now you can start roughing in animation in a style that is like traditional on-paper animation. Go to the “Timeline” which is arranged at the bottom of the window and click on the words “layer 1” under the “Timeline” tab. This will allow you to edit the layer name. Change the name of the layer to something representative of the animation you will create, for instance “cat walk rough anim.” Next, to the right of the layer controls, under the number one, right-click (PC) or control click (MAC) to get a pop-up menu and choose “insert blank keyframe.” Now, with the new blank keyframe you just created still selected and highlighted, draw a key or extreme drawing for your animation on the stage (the area above the timeline).*  

The timeline with a layer and a new blank keyframe added.
Next choose a frame several frames from the key or extreme you just drew; right click or control click and choose “insert blank keyframe” again. This creates a new “keyframe” to draw on and opens a set of grayed-in brackets above the timeline. Draw your extreme or your next key on the stage in this new blank keyframe (you can move it around or change it later if you like).
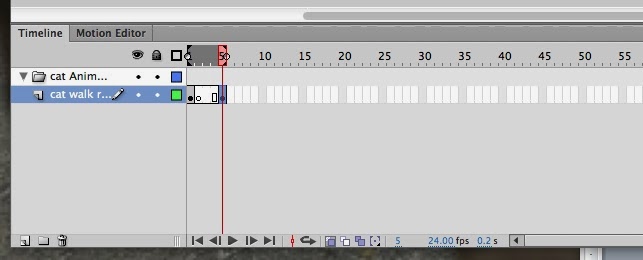
This is the previous layer, renamed, with a second keyframe added. It has also been put in a folder here in anticipation of adding more layers, a background and other essential animation layers. Use folders and layer names to keep your work neat and orderly or face the inevitable consequences later.


BTW– If you click on the onionskin button (see image below) you can drag the brackets that appear above the timeline to control which portion of the timeline is being viewed in onionskin or played back.

The onionskin button is highlighted here.
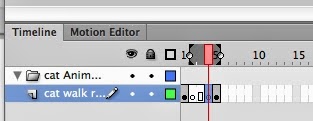
In this picture you can see the onionskin brackets above the timeline, with the red scrub-bar or playhead positioned over the selected span.
At this point, because you have all done this in ToonBoom and Harmony already, you should have the idea. There are many more ways to create animation in Flash, but this is a good way for traditional 2D animators to get a feel for the tools. I’ll get to one of these to you, simple motion tweening, the next time I post a demo for you. (I’ll try to do this next one as video.)


*You may add an additional layer or sub-layer that holds a background or motion layout by going to the bottom left corner of the work window and clicking on the “new layer” icon.
 
new layer button
 To get the image you draw in this layer to show up across a span of frames, simply click on the image’s cell or box in the newly created layer’s timeline and then choose a box near the end of the running length of the animation and right-click (PC) or control click (MAC) to get the pop-up menu, then choose “insert frame.” This will make the image present in all the frames between its origin frame and that last frame you chose. (If this image is a background, its layer will need to be below all of the other layers or it will block your view of them.)

If you want to add this new layer as part of a group with the current work layer, simply use the folder icon that is to the right of the “new-layer” icon in the bottom left hand corner. Clicking on the “new folder” icon will create a folder in which you may group your layers. Drag and drop your layers onto this folder layer to group them.


The new layer, folder and trash buttons in the bottom left corner of the workspace.

CHEERS everybody!
Have a good weekend.